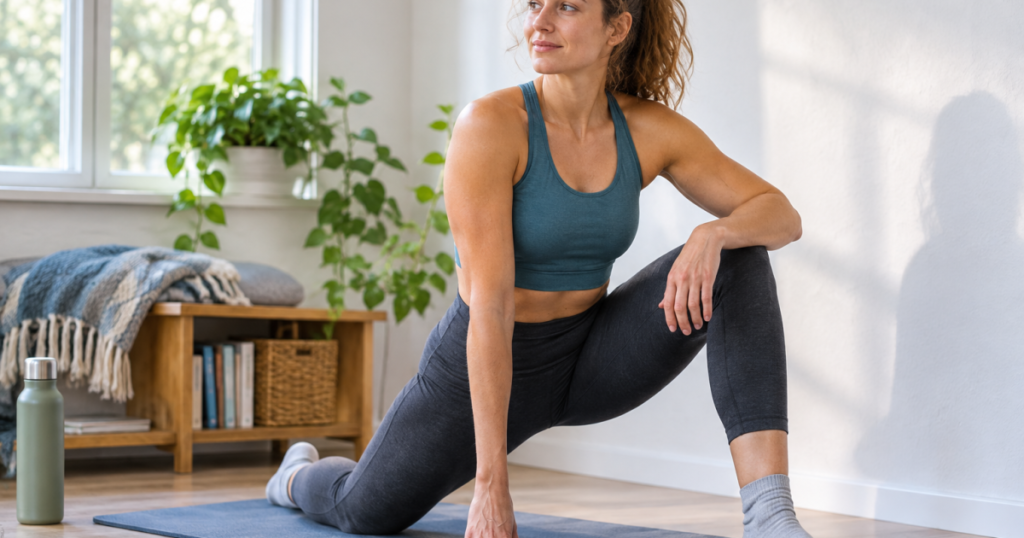
After a walk, your body may not need a complicated cooldown. A post-walk recovery session can be as simple as eight quiet minutes, a clear patch of floor, and a wall you can lean on. The goal is not to chase a dramatic stretch or “fix” every tight spot. It is to help your breathing settle, give your calves and hips a little attention, and make the next part of your day feel less abrupt.
Diagnosis or treatment of persistent, severe, worsening, or unexplained pain should be carried out by a qualified healthcare professional in line with local standards of care; the routine below is for general post-walk comfort and mobility.
The short version
This eight-minute reset is designed for normal post-walk stiffness, not injury care. Keep the intensity mild to moderate, move slowly, and stop any drill that feels sharp, nervy, dizzying, or wrong for your body.
- Minute 1: Stand at the wall and downshift your breathing.
- Minute 2: Wake up ankles and calves with gentle wall-supported movement.
- Minute 3: Ease the backs of the legs with a supported hinge.
- Minute 4: Open the front of the hips without forcing a lunge.
- Minute 5: Move into a floor-based glute stretch.
- Minute 6: Add an easy upper-back rotation.
- Minute 7: Rest with legs supported by the wall.
- Minute 8: Check in and choose your next step.
If walking is part of a bigger training rhythm, it helps to think beyond one isolated cooldown. A broader sustainable recovery week can give walking, lifting, running, Pilates, rest, and wind-down time their own places without turning recovery into another demanding project.
Before you start
Choose a wall where your feet will not slide and a floor surface that feels comfortable enough for a few minutes of lying down. A rug, mat, or carpeted area can make the floor work easier, but you do not need dedicated equipment.
Use a simple pressure scale: aim for about a 3 to 5 out of 10. You should be able to breathe normally, unclench your jaw, and leave the session feeling steadier rather than drained. More sensation is not automatically more useful. For many walkers, the routine that gets repeated three times a week matters more than the stretch that feels intense once and then gets avoided.
The 8-minute wall-and-floor routine
0:00 to 1:00 — Stand, breathe, and let the walk end
Stand facing the wall with your hands resting lightly at shoulder height. Place your feet hip-width apart. Take five slow breaths, letting each exhale be a little longer than the inhale. Soften your knees and notice where your weight sits: heels, toes, inside edges, outside edges.
This first minute is deliberately uneventful. It tells your body that the walk is over and gives you a moment to shift out of forward momentum before stretching.
1:00 to 2:00 — Wall-supported calf pumps
Keep your hands on the wall. Step one foot back and press that heel toward the floor without locking the knee. Bend and straighten the back knee slowly 6 to 8 times, then switch sides. Think of it as movement, not a hold.
This works well after neighborhood walks, treadmill walks, hillier routes, or days when your calves feel a little springy. Stay light. If your heel does not reach the floor, that is fine.
2:00 to 3:00 — Supported hamstring hinge
Stand about an arm’s length from the wall. Place both hands on the wall, walk your feet back slightly, and send your hips behind you until your torso angles forward. Keep a soft bend in your knees and your spine long. Hold for three slow breaths, stand up, then repeat once.
You are looking for a gentle line through the backs of the legs, not a contest with your flexibility. If you feel tugging behind the knees, bend them more.
3:00 to 4:00 — Easy hip-front opener
Turn so one side of your body is near the wall. Hold the wall lightly for balance. Step one foot back into a short split stance, tuck your pelvis slightly, and bend both knees just enough to feel the front of the back hip wake up. Hold for two breaths, release, and repeat on the other side.
This is useful after faster walking or long sitting before your walk. Keep the stride short; a smaller position often lets you feel the hip without dumping into the low back.
4:00 to 5:00 — Floor figure-four with wall support
Lie on your back with your feet on the wall and knees bent. Cross your right ankle over your left thigh. Stay here, or slide your left foot a little lower on the wall until you feel a mild stretch around the right hip and glute. Breathe for 20 to 30 seconds, then switch sides.
Your shoulders and head should be relaxed on the floor. If your hip feels pinchy, uncross the leg and move on.
5:00 to 6:00 — Open-book rotation
Lie on one side with knees bent and stacked. Reach your top arm forward, then slowly open it toward the floor behind you as your chest rotates. Follow your hand with your eyes if that feels comfortable. Do 3 slow reps, then switch sides.
Walking is lower-body dominant, but your rib cage, shoulders, and upper back still participate. This minute gives your trunk a little movement after arm swing, phone carrying, stroller pushing, or desk posture.
6:00 to 7:00 — Legs on the wall, knees soft
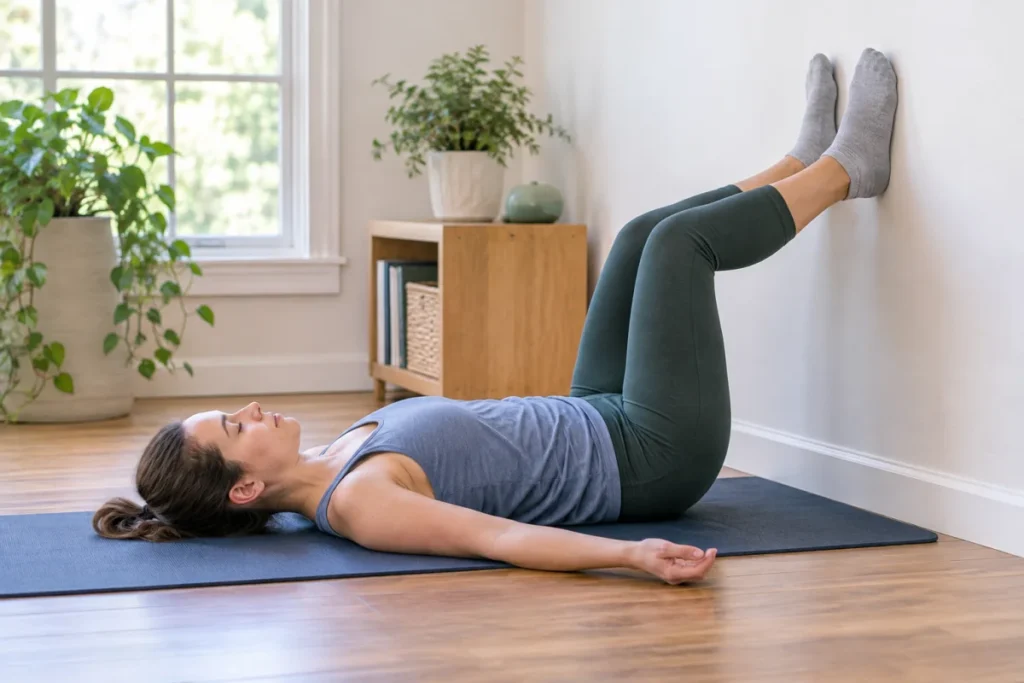
Lie on your back with your lower legs resting against the wall. Your knees can be bent; your hips do not need to touch the baseboard. Let your arms rest wherever they are comfortable and take four to six calm breaths.
This is a pause, not a performance. If the position feels too intense in the hamstrings, scoot farther from the wall or place your feet flat on the wall instead.
7:00 to 8:00 — Check in before you get up
Roll to one side and come up slowly. Notice your calves, hips, breathing, and energy. Ask one question: “What would help me continue my day?” The answer might be water, a snack, a shower, warmer socks, or simply not rushing into the next thing.
How it should feel
A good post-walk recovery session should feel calming and doable. Mild stretch, warmth, gentle pressure, and a sense of loosening are all reasonable. Sharp pain, numbness, tingling, increasing discomfort, or a feeling that you are bracing through the whole routine are signs to stop and reassess.
It is also normal for the first attempt to feel slightly awkward. The routine becomes smoother once you know where to place your feet, how close to the wall feels good, and which minute your body appreciates most.
Adjust the routine to match your walk
- After an easy 20-minute walk: Do the full routine gently, or choose only the breathing, calf pumps, and legs-on-wall rest.
- After a long walk: Move more slowly through the calf, hamstring, and hip sections. Do not add intensity just because the walk was longer.
- After hills or stairs: Give extra care to the calf pumps and hip-front opener, but keep both comfortable.
- After an evening walk: Make the last two minutes quieter and dim the room if you are trying to transition toward bedtime.
- On a low-energy day: Do minute 1, minute 6, and minute 7 only. Three gentle minutes still count.
When tools can wait
Starting with a wall-and-floor routine is useful because it teaches you what your body actually responds to before you add gear. If your calves like movement, a soft roller might make sense later. If your hips prefer steady positioning, a strap or mat-based routine may be more repeatable. If you enjoy quiet pressure while winding down, an acupressure mat may be worth learning about another day.
When you are ready to explore tools, the Home Recovery Tool Finder can help narrow options by intensity style, target body area, portability, heat preference, and budget. But for this first routine, the cleanest choice is to keep it simple and notice what you will actually repeat.
Small checks that make it easier to repeat
- Keep the setup obvious: Use the same wall each time so there is no decision to make.
- Pair it with an existing cue: Start after taking off your walking shoes, filling your water bottle, or hanging up your jacket.
- Lower the bar on busy days: One minute of breathing and one wall calf drill is better than skipping recovery because eight minutes felt impossible.
- Do not chase soreness: The goal is a smoother transition after walking, not proving that you worked hard.
- Track repeatability, not perfection: If you finish feeling more settled, the session did its job.
Key questions answered
Should you do this after every walk?
No. Use it when it helps: after longer walks, hillier walks, faster walks, or days when you feel stiff from sitting. If you feel great and need to move on, a short breathing minute may be enough.
Can this replace stretching?
It can be your stretching on many walking days. The routine combines gentle mobility, supported positions, and rest, which is often more approachable than a long list of separate stretches.
What if eight minutes feels too long?
Cut it to three minutes: breathe at the wall, do calf pumps, and rest with feet on the wall. A shorter version that happens regularly is more useful than a longer routine you avoid.
Keep it simple enough to come back to
The best first recovery session is not the one with the most steps. It is the one you can remember when you are a little tired, a little sweaty, and already thinking about the rest of your day. A wall gives you balance. The floor gives you support. Eight minutes gives you just enough structure to slow down without turning recovery into another workout.
For more calm, realistic ideas that fit around walking, strength, Pilates, and everyday stiffness, browse the recovery routine library and choose the next habit that feels easy enough to repeat.